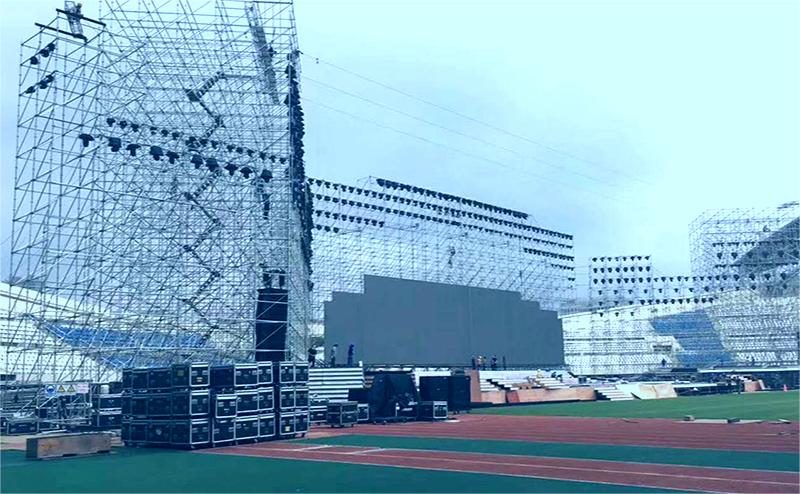
How Are Steel Ringlock Trusses Installed? A Practical Installation Guide
Steel Ringlock structures are widely used for temporary event platforms, FOH structures, grandstands, support towers, LED display systems, and other modular structures that require fast assembly and reliable stability.
Although Ringlock systems are designed for efficient installation, professional results depend on much more than simply connecting components together. A successful installation requires proper planning, suitable equipment, trained personnel, controlled assembly procedures, and systematic inspection.
A Ringlock structure is not completed when the last component is connected.
It is completed when every connection, alignment point, and safety requirement has been verified.
Before starting the practical installation process, it is important to understand the engineering logic behind the sequence. The principles explained in Foundation First, Vertical Second, Bracing Always: Ringlock Installation Methodology provide the structural foundation for understanding why Ringlock systems should be installed in a controlled sequence.
This practical guide focuses on another question:
How do installers actually build a Ringlock structure safely on site?
1. Installation Planning Before Assembly
Professional Installation Starts Before the First Component Is Connected
One of the most common misunderstandings about modular structures is that installation begins when workers start assembling components.
In reality, professional installation begins before materials arrive at the construction area.
A complete installation plan should consider:
Project drawings
Structural configuration
Installation sequence
Required equipment
Worker responsibilities
Site conditions
Weather conditions
Safety requirements
The purpose of planning is to reduce uncertainty before construction begins.
A well-prepared installation team does not simply react to problems during assembly. It identifies potential problems before they affect the structure.
For complex temporary structures, the installation process should be coordinated with the overall structural design. More information about modular structural planning can be found in Modular System Logic for Stage, Truss & Scaffold Systems.
1.1 Review Structural Drawings and Layout
Before installation begins, the team should review the approved drawings carefully.
Important information includes:
The purpose of drawing review is to ensure that every team member understands the intended final structure.
Common installation problems often occur because:
The crew works from outdated drawings.
Components are installed in the wrong position.
Structural changes are made without review.
Additional loads are added without consideration.
For projects involving custom temporary structures, engineering review should be completed before fabrication and installation. See Engineering Solution for more information about structural planning and customized solutions.
1.2 Inspect Ringlock Components Before Installation
Before assembly, all components should be inspected.
Typical Ringlock components include:
Vertical standards
Horizontal ledgers
Diagonal braces
Base jacks
Adjustable supports
Deck supports
Stairs and accessories
Inspection should confirm:
Structural Condition
Check for:
Connection Condition
The Ringlock connection system depends on accurate engagement between components.
Inspect:
Rosettes
Wedges
Connector heads
Locking mechanisms
Damaged components should never be forced into position.
For more information about Ringlock manufacturing quality and structural reliability, refer to How Are Steel Ringlock Structures Manufactured for Event Applications?.
1.3 Check Site Conditions Before Assembly
The installation area should be inspected before the first base component is positioned.
Important factors include:
Ground Condition
The team should confirm:
Ground stability
Levelness
Bearing capacity
Drainage condition
A temporary structure transfers all loads back to the ground. Poor site conditions can affect the entire installation.
Working Space
Adequate space should be available for:
Material storage
Component movement
Lifting operations
Worker access
Emergency movement
A congested installation area increases the possibility of accidents and slows down construction.
Weather Conditions
Weather should be considered before and during installation.
Special attention is required for:
Strong wind
Heavy rain
Lightning
Poor visibility
Temporary structures are especially sensitive during incomplete installation stages.
For broader safety considerations related to temporary event structures, see Safety Standards and Engineering Constraints.
2. Required Equipment for Ringlock Installation
A professional Ringlock installation requires more than structural components.
The correct equipment improves:
Installation efficiency
Worker safety
Alignment accuracy
Quality control
The required equipment depends on the project size and configuration.
Common Installation Equipment
| Equipment | Main Purpose |
|---|
| Mobile crane | Lifting large structural components |
| Forklift | Moving materials around the site |
| Chain hoist | Positioning heavy components |
| Laser level | Checking structural alignment |
| Spirit level | Verifying horizontal accuracy |
| Measuring tools | Confirming dimensions |
| Safety harness | Fall protection during elevated work |
| Lifting slings | Safe material handling |
| Temporary barriers | Controlling working areas |
Why Equipment Selection Matters
Using unsuitable equipment may create unnecessary risks.
For example:
Manual lifting of oversized components may increase injury risk.
Incorrect lifting methods may damage structural members.
Poor measuring equipment may create alignment problems.
Professional installation is not only about having enough manpower.
It is about creating a controlled installation environment.
3. Installation Crew and Responsibilities
A Ringlock Structure Requires Coordination, Not Only Labor
A common misunderstanding is that Ringlock installation is mainly a manual assembly task. In reality, professional installation is a coordinated engineering activity involving different roles, each responsible for a specific part of the process.
A safe and efficient installation team usually includes:
The purpose of defining responsibilities is to avoid confusion during installation.
A Ringlock structure may contain thousands of connection points. Without clear communication and supervision, small mistakes can accumulate and affect the final structural condition.
For complex event structures, installation coordination should follow the same principles described in Installation Methodology for Modular Stage, Truss and Scaffold Systems.
3.1 Project Supervisor
Responsible for Overall Installation Control
The project supervisor manages the entire installation process.
Main responsibilities include:
Reviewing installation drawings
Confirming installation sequence
Coordinating workers and equipment
Checking progress against the schedule
Communicating with engineers or project managers
Approving major installation stages
The supervisor should ensure that the installation follows the approved design rather than allowing uncontrolled modifications on site.
For temporary structures, changes made during installation may affect:
Structural loads
Stability
Connection requirements
Safety conditions
Therefore, any significant modification should be reviewed before implementation.
3.2 Installation Leader
Responsible for Daily Construction Execution
The installation leader works directly with the installation crew and converts the installation plan into practical steps.
Typical responsibilities include:
Assigning tasks to workers
Checking component preparation
Supervising connection installation
Confirming correct bracing positions
Organizing daily safety meetings
Reporting installation problems
The installation leader is usually the person who identifies problems first during actual construction.
Examples include:
Missing components
Incorrect member positioning
Damaged connections
Difficult site conditions
Unexpected installation conflicts
Early identification prevents small issues from becoming structural problems.
3.3 Structural Installers
Responsible for Component Assembly
Structural installers perform the main physical assembly work.
Their responsibilities include:
Installing vertical standards
Connecting horizontal ledgers
Installing diagonal braces
Securing Ringlock connections
Installing platforms and accessories
Following the approved sequence
Installers must understand that every connection contributes to the overall structural behavior.
A Ringlock structure is not a collection of independent parts.
Each member works together as part of a complete load-transfer system.
For a better understanding of Ringlock structural components, see:
What Is a Steel Ringlock Structure? Applications, Advantages and Event Uses
3.4 Riggers and Lifting Operators
Responsible for Safe Material Handling
Large Ringlock structures often involve heavy components, roof structures, LED support systems, or other elevated assemblies.
Riggers and lifting operators are responsible for:
Selecting suitable lifting methods
Checking lifting equipment
Securing loads correctly
Maintaining communication during lifting operations
Preventing uncontrolled movement
Incorrect lifting procedures can damage components or create serious safety risks.
Special attention should be given when installing:
Large roof beams
LED support structures
Speaker towers
High-level components
For related applications, see:
3.5 Safety Officer
Responsible for Installation Safety Control
The safety officer ensures that installation activities are carried out under safe conditions.
Main responsibilities include:
Checking personal protective equipment
Monitoring working-at-height activities
Controlling restricted areas
Checking lifting operations
Monitoring weather conditions
Stopping unsafe operations
Safety management should not only focus on the completed structure.
The most vulnerable period is often during installation, when the structure is incomplete and temporary stability is still developing.
4. Step-by-Step Ringlock Installation Procedure
From Foundation Preparation to Final Inspection
The following sequence describes a typical professional Ringlock installation process.
The exact procedure may vary depending on the project design, but the fundamental logic remains:
Prepare the foundation → Build the structural frame → Add stability → Complete the final system
This practical sequence follows the engineering principles explained in Foundation First, Vertical Second, Bracing Always: Ringlock Installation Methodology.
Step 1: Site Preparation and Layout Marking
Before installing any structural components, the installation team marks the required positions according to the approved drawings.
This includes:
Column locations
Bay dimensions
Access points
Stair locations
Equipment positions
Accurate layout prevents later adjustment problems.
A common mistake is trying to correct positioning after the structure has already started rising.
At that stage, adjustments become more difficult because errors have already transferred into the upper levels.
Step 2: Install Base Jacks and First-Level Standards
The installation begins from the base.
The team installs:
At this stage, installers check:
The first level creates the reference for the entire structure.
Therefore, it should be carefully measured before continuing upward.
Step 3: Install Horizontal Ledgers
After the vertical standards are positioned, horizontal ledgers are installed.
The ledgers connect the standards and create the basic structural grid.
Their functions include:
Maintaining spacing between standards
Improving frame stiffness
Creating the foundation for additional levels
Each connection should be fully engaged and checked before moving upward.
Incomplete connections at this stage may affect all following installation steps.
Step 4: Install Diagonal Bracing
Diagonal bracing should be installed during the structural build-up process, not after completion.
Bracing provides resistance against lateral movement and helps transform individual frames into a stable three-dimensional structure.
Installers should verify:
Correct brace locations
Complete connections
No missing members
No damaged components
For more information about structural stability and bracing principles, refer to:
Step 5: Build Additional Levels
For multi-level Ringlock structures, the installation continues upward level by level.
Each completed level should be checked before the next level begins.
The team should confirm:
Vertical alignment
Connection engagement
Bracing completion
Structural stability
A controlled upward sequence reduces cumulative errors.
Step 6: Install Platforms, Roof Supports and Additional Systems
After the main Ringlock frame reaches the required height, additional systems can be installed.
Depending on the application, these may include:
Stage decks
FOH platforms
LED support frames
Roof structures
Guardrails
Stair systems
For example, Ringlock systems are often combined with LED structures and event support systems. Related examples include:
Step 7: Final Adjustment Before Operation
Before the structure is opened for use, the installation team performs final adjustments.
This includes:
Only after the final inspection confirms that the structure matches the intended configuration should the structure enter service.