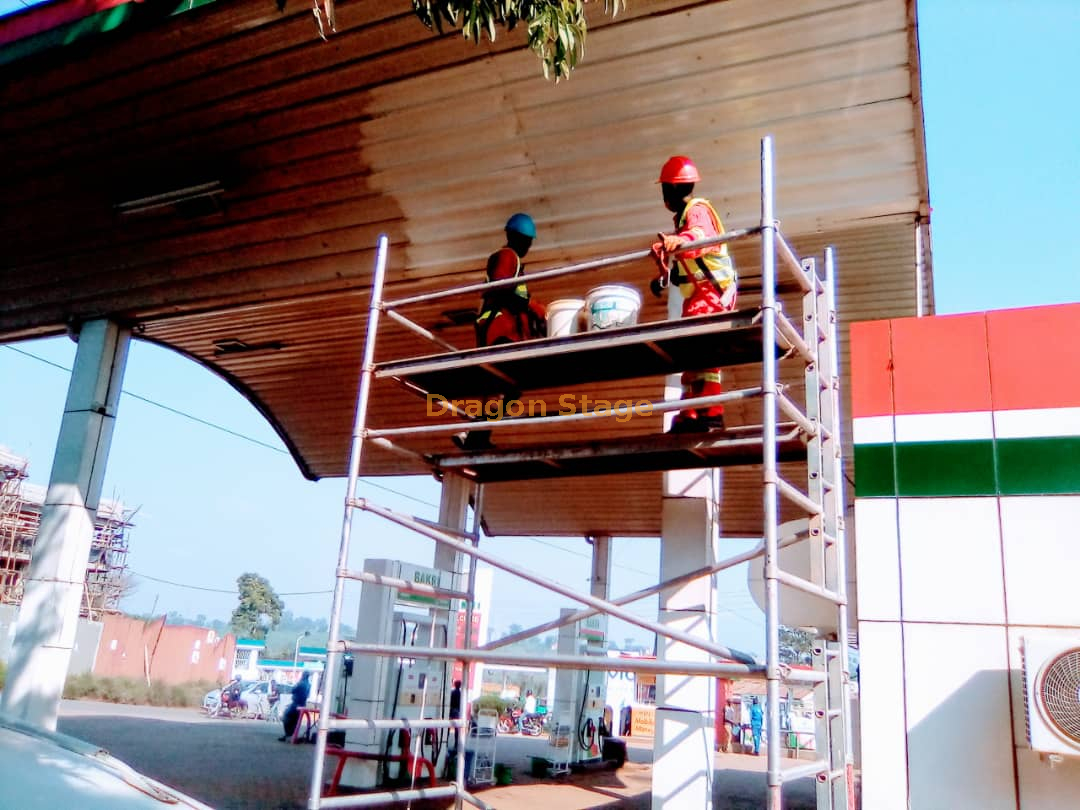
A scaffold provides support for a work crew and materials when building, maintaining, and repairing man-made structures. This is a temporary pop-up structure that is used by any construction team crew. Scaffolding is necessary for repairing, maintaining, and building on any construction site. To reach a high spot or platform during construction work aluminium scaffold is quite effective. Without this instrument working on a higher platform becomes difficult. A careless scaffolding can cause terrible injury or even death for users.
The safe erection of a scaffold is crucial to avoiding accidents. Let's check out the proper procedure how to do you erect an aluminium scaffold.
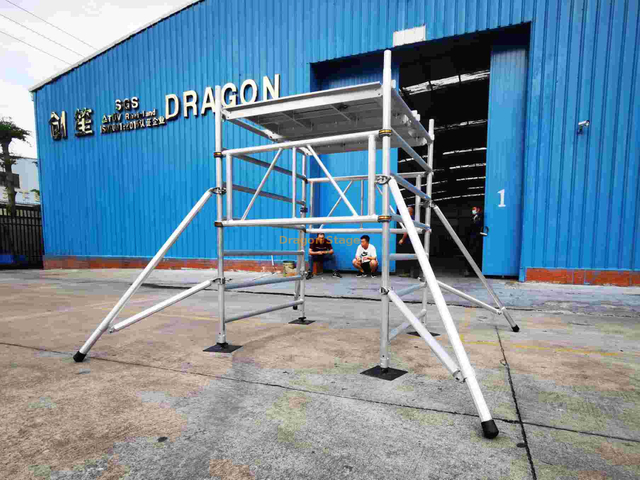
Process of Erecting An Aluminium Scaffold (How to)
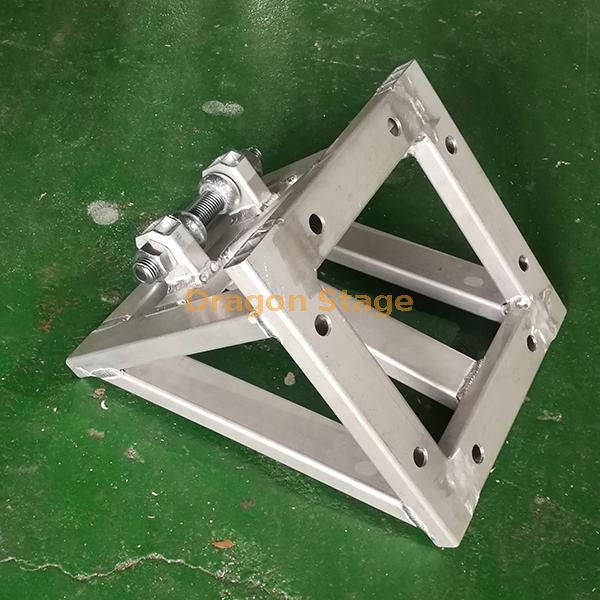
Step 1: Adjust Castor Tap
First, you must fit the castor tap on the adjustable scaffold leg and carefully set all spigots. Next, push an elastic leg and castor into the ladder of 2 rungs.
Step 2: Repeat The First Step
When you are done with the castor, set up the 1m ladder stand, and redo the process.
Step 3: Stable setup of frame
It would help if you made the self-standing frame with an external nail surface. And set a horizontal stand onto a vertical frame over the ladder's lowest rung.
Step 4: Make The Square Frame
Now, you have to connect one horizontal brace over a vertical point and add another brace on another point to set up the square frame.
Step 5: Additional Frame Setup
Connect two different frames at the endpoint and make sure they are properly locked.
Set up two crosswise (diagonal) braces (1st and 3rd rung of ladder) in reverse directions where frames are in vertical position.
Step 6: Check out Four Rubber Wheels Are Balanced
Connect four beams and ensure ground touching of rubber castor while making the tower.
Step 7: Temporary Deck and Trapdoor For Other Fitting
Set up a temporary platform on the bottom rung of the ladder. On the fourth rung (0.2m), you must fit a side door deck with another trapdoor alongside the ladder.
The trapdoor should be positioned with the grip in the direction of the outer side of the structure. For this, you must climb up to the ladder and stand in the safe zone of the trapdoor. Now set guardrails on the fifth and sixth rung from both sides of the deck.
The safe placing of guardrails is crucial, do not move before that. Horizontal braces must be connected like handrails at 0.5m and 1.0m on the 1st and 2nd rungs over the deck level.
Step 8: Connecting Two Secondary Ladders
You must connect two ladders and a span stands to finish the structure.
Step 9: Set Up of Fifth and seventh, Seventh and Tenth Rung
In the middle of the 5th and 7th, also the 7th and 10th rungs of the ladder, connect two extra crosswise (diagonal) braces at 4.2m height. Reconstruct the stable deck to the 8th rung.
Step 10: Fit the provisional Deck To The Eighth Bar of The Ladder
It's time for you to detach temporary decks from the lowest bar of the ladder. This deck has to be fit on the 8th rung with a side door next, and grips should be at the outer side of the tower where the trapdoor is alongside the ladder.
Go up to the ladder, standing from the safest trapdoor; on the 9th and 10th rung, set up the guardrails in the direction of two sides of the pillar.
Step 11: Ninth and Tenth Rung Fitting
Next, guardrails must be fitted on the 9th and 10th rungs; go up to the safest trapdoor on the ladder. Before all this setup, you should check on the castor boards' proper fitting. And avoid climbing up the ladder until guardrails are correctly fitted. Now, your scaffold setup is finished.
Note: (All braces have to be strongly connected and locked. Avoid creating extra height, Use adjustable legs to level the pillars)
Conclusion
When it comes to fitting a scaffold, it is extremely important to do it carefully in order to ensure its effectiveness. Otherwise, an unwanted situation can occur. We hope this scaffolding setup process will be effective for you while you try the setup.
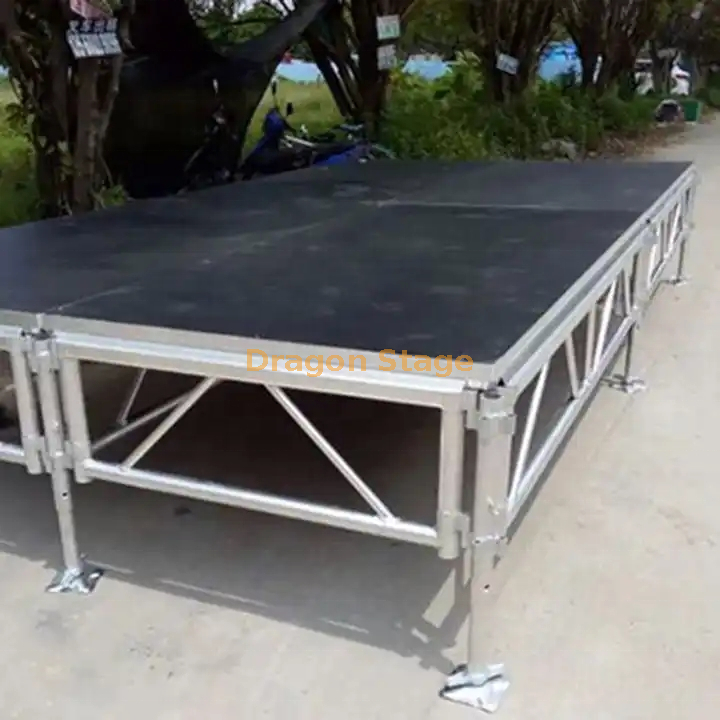
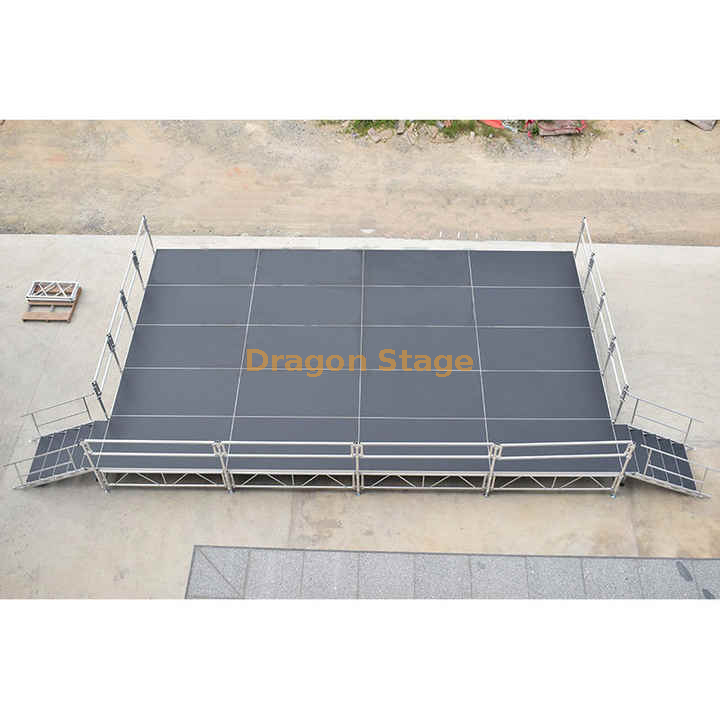
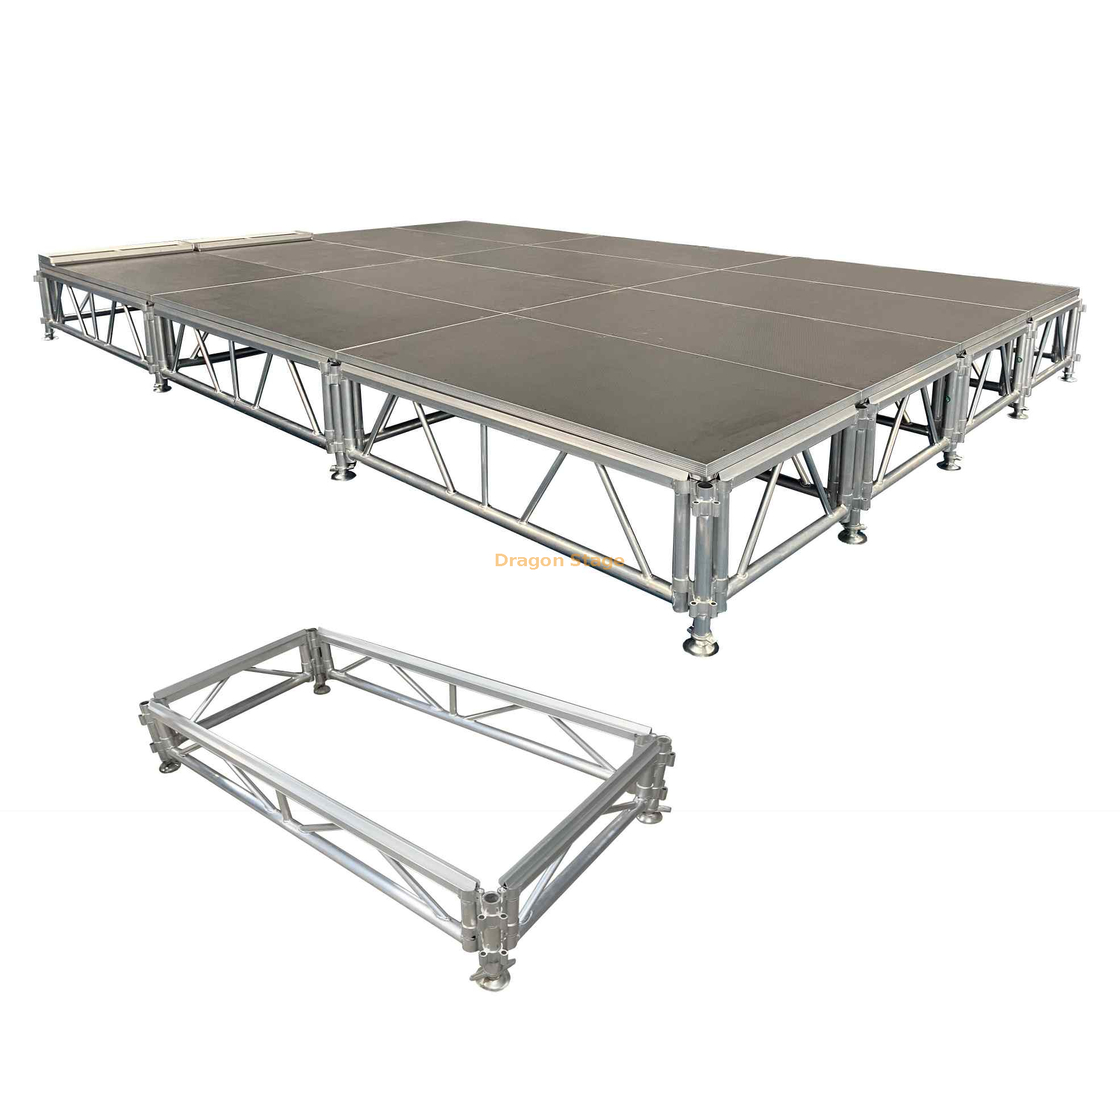
this is a custom sizes Outdoor Adjustable Aluminum Portable Stage Platform, it is For Concert Show Event, total sizes are 30m long, 20m wide, with 2 stairs.
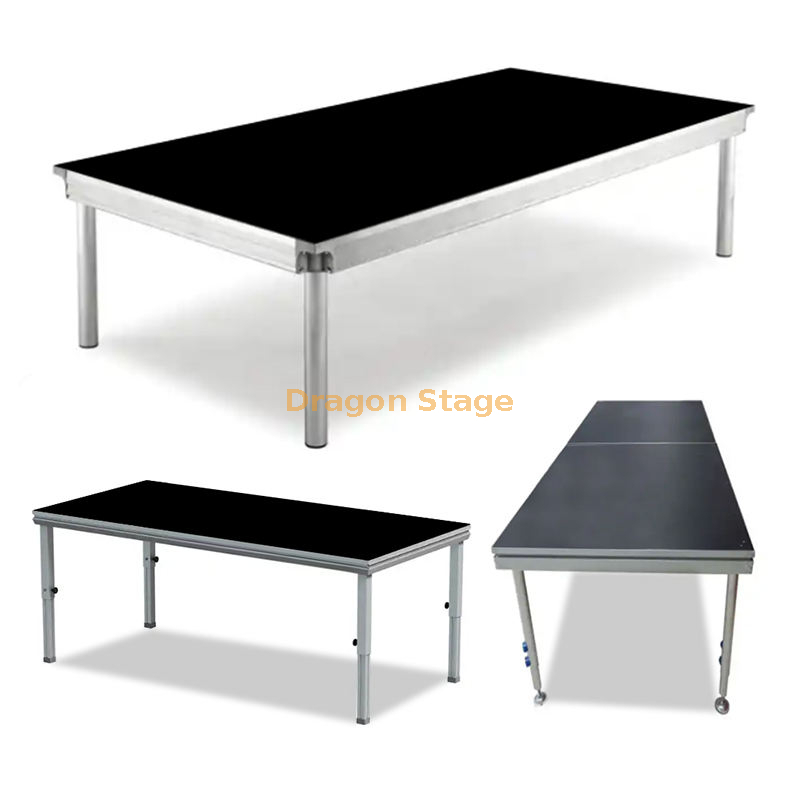
The Quick Lock Adjustable height 2x1m Aluminum Portable Stage Platform, with a total size of 7x6m, is a versatile and convenient solution for various events and performances. This portable stage platform offers quick and easy setup with its adjustable height feature, allowing for customization based on the needs of the event.
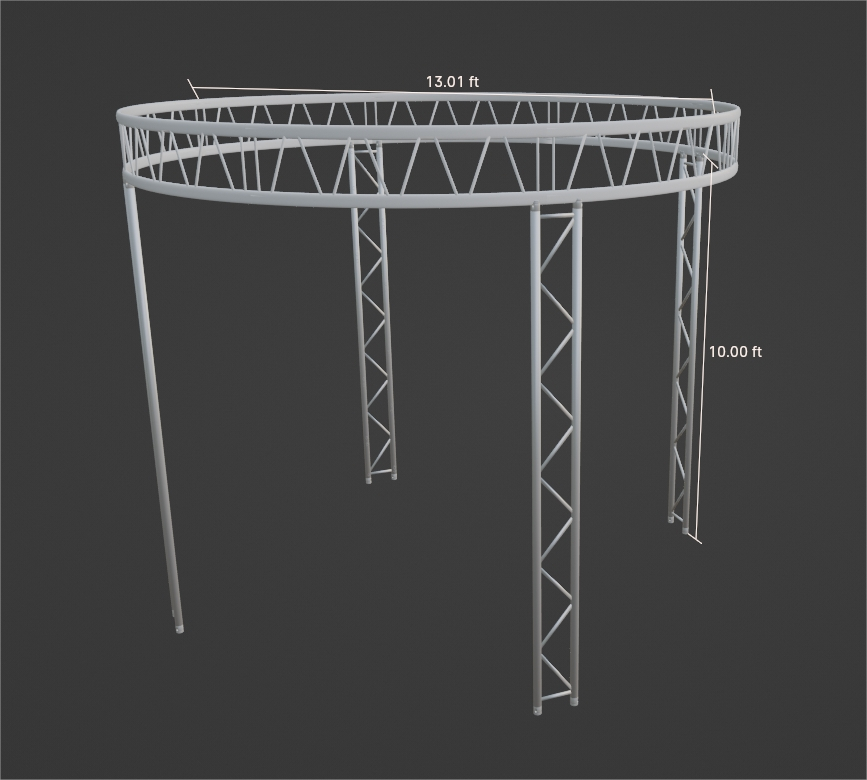
This document outlines the design of a custom circular trade show booth utilizing a ladder truss system with a 4-meter diameter and 3-meter height. This unique and eye-catching structure offers a versatile platform for showcasing your brand and engaging with potential customers.
Tempered Glass Stage Bar Ktv Resident Stage Catwalk Show T Stage Wedding Hotel Event Piano Display Luminous Platform from China manufacturer - DRAGON STAGE
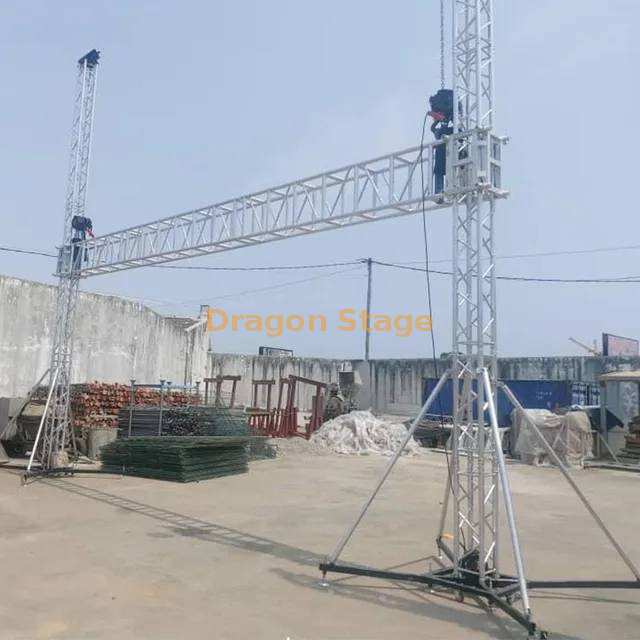
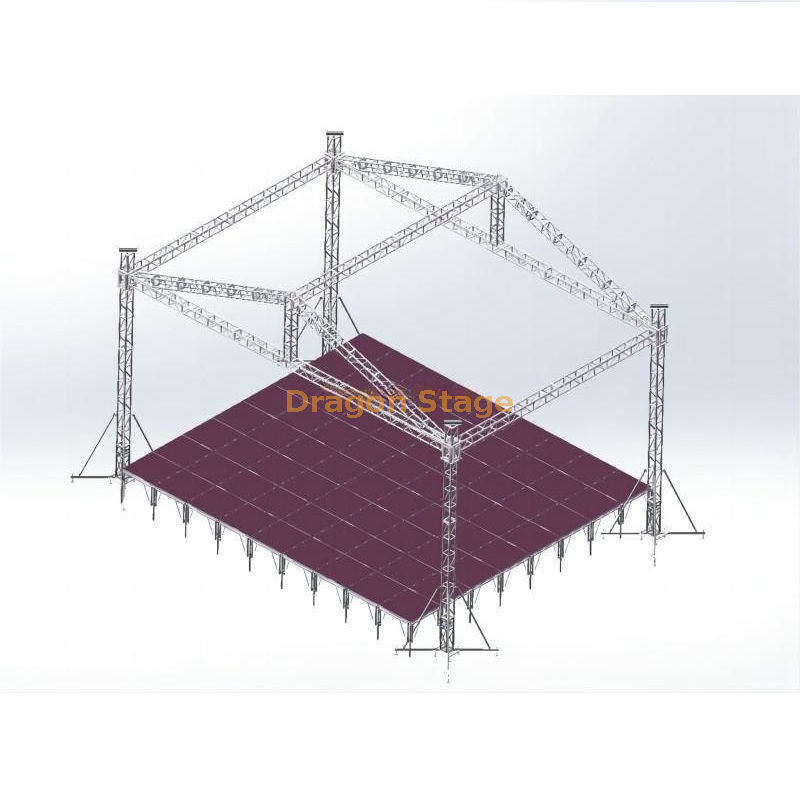
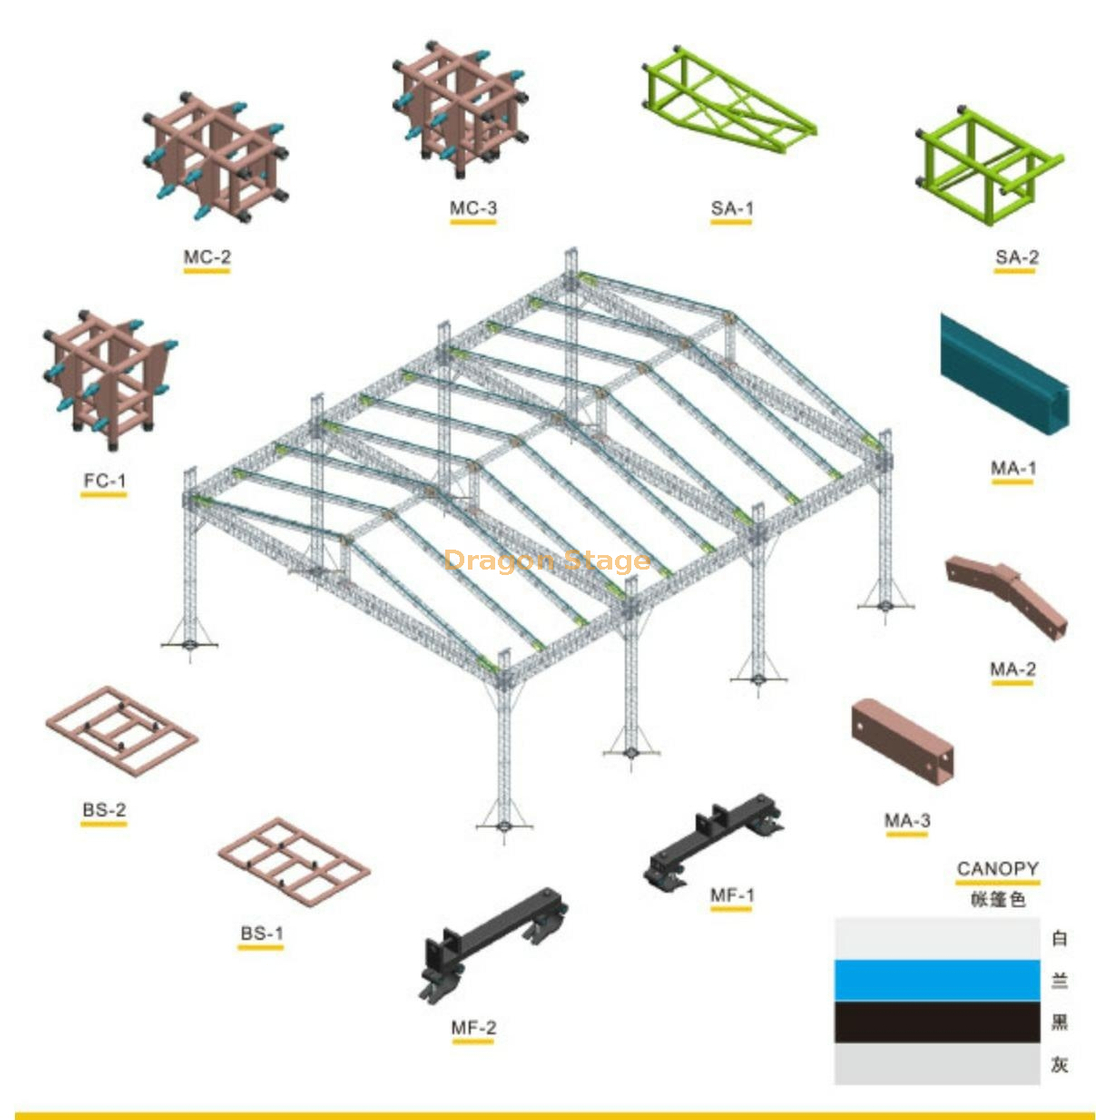
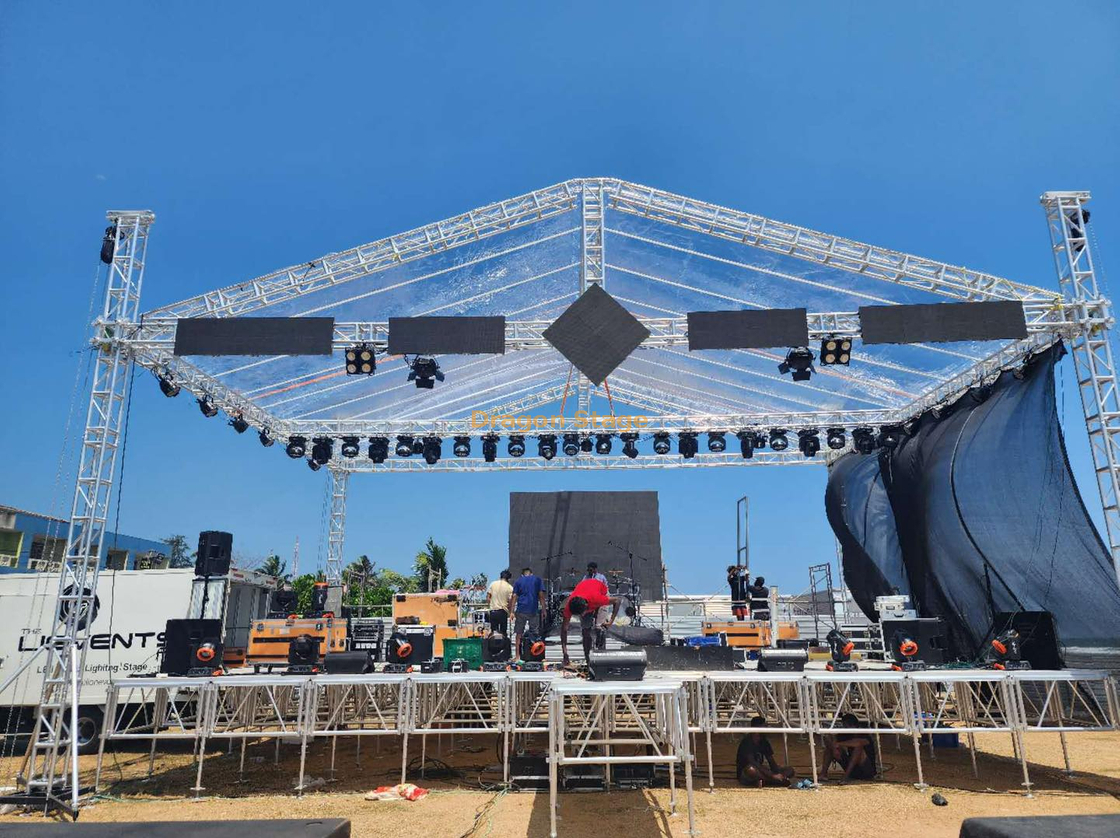
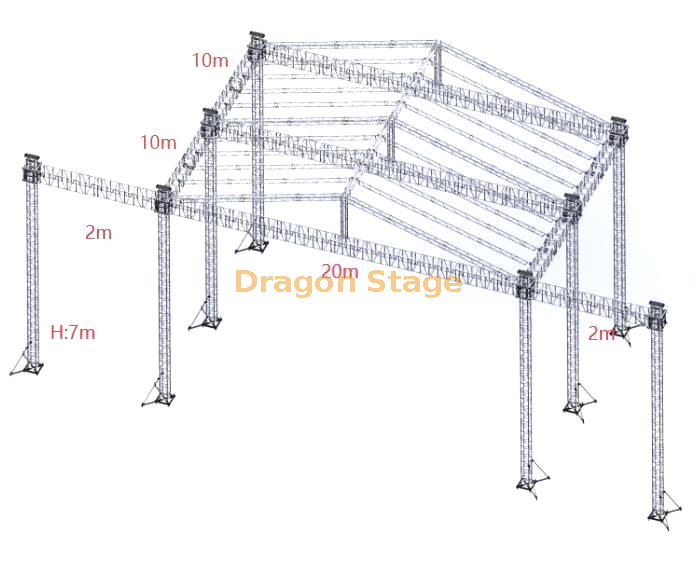
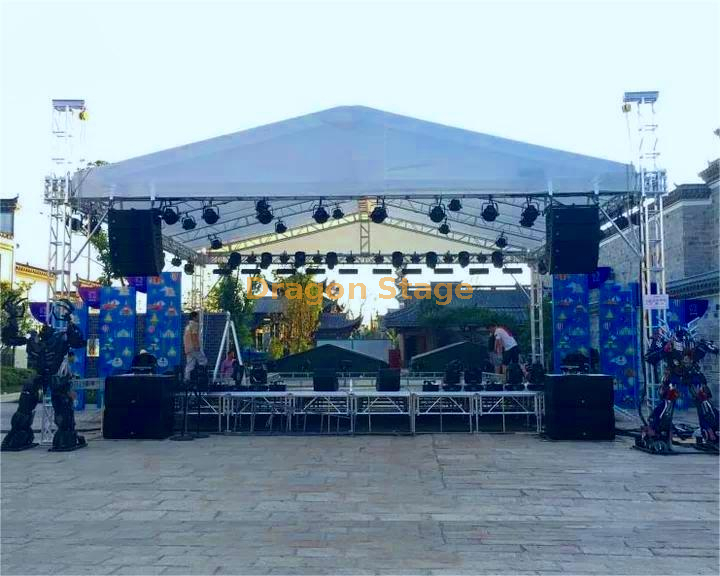
this is custom Aluminum Outdoor Event Truss System, it is Concert Roof Truss system with 2-meter wings Hanging Speakers, it is 20m wide, 20m deep and 7m high
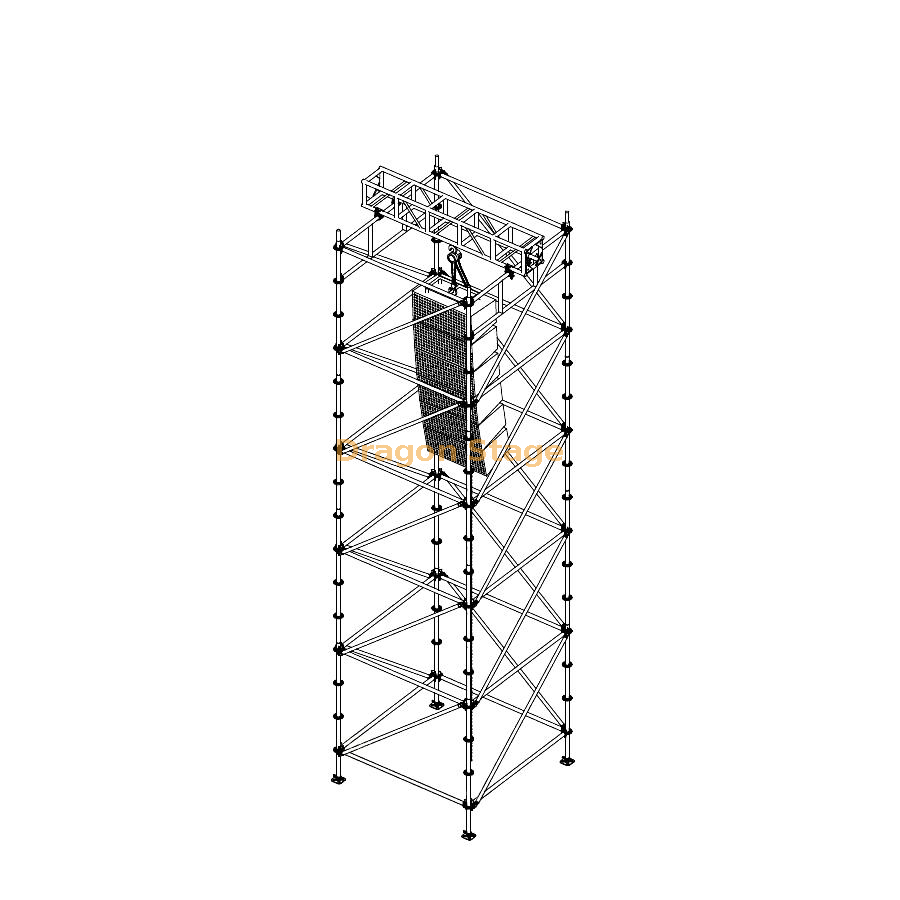
The use of aluminum truss beam Layher towers for hanging sound speakers has become increasingly popular in recent years, particularly for large-scale events and concerts. This essay will provide a comprehensive overview of this system, exploring its key components, advantages, and considerations for implementation.
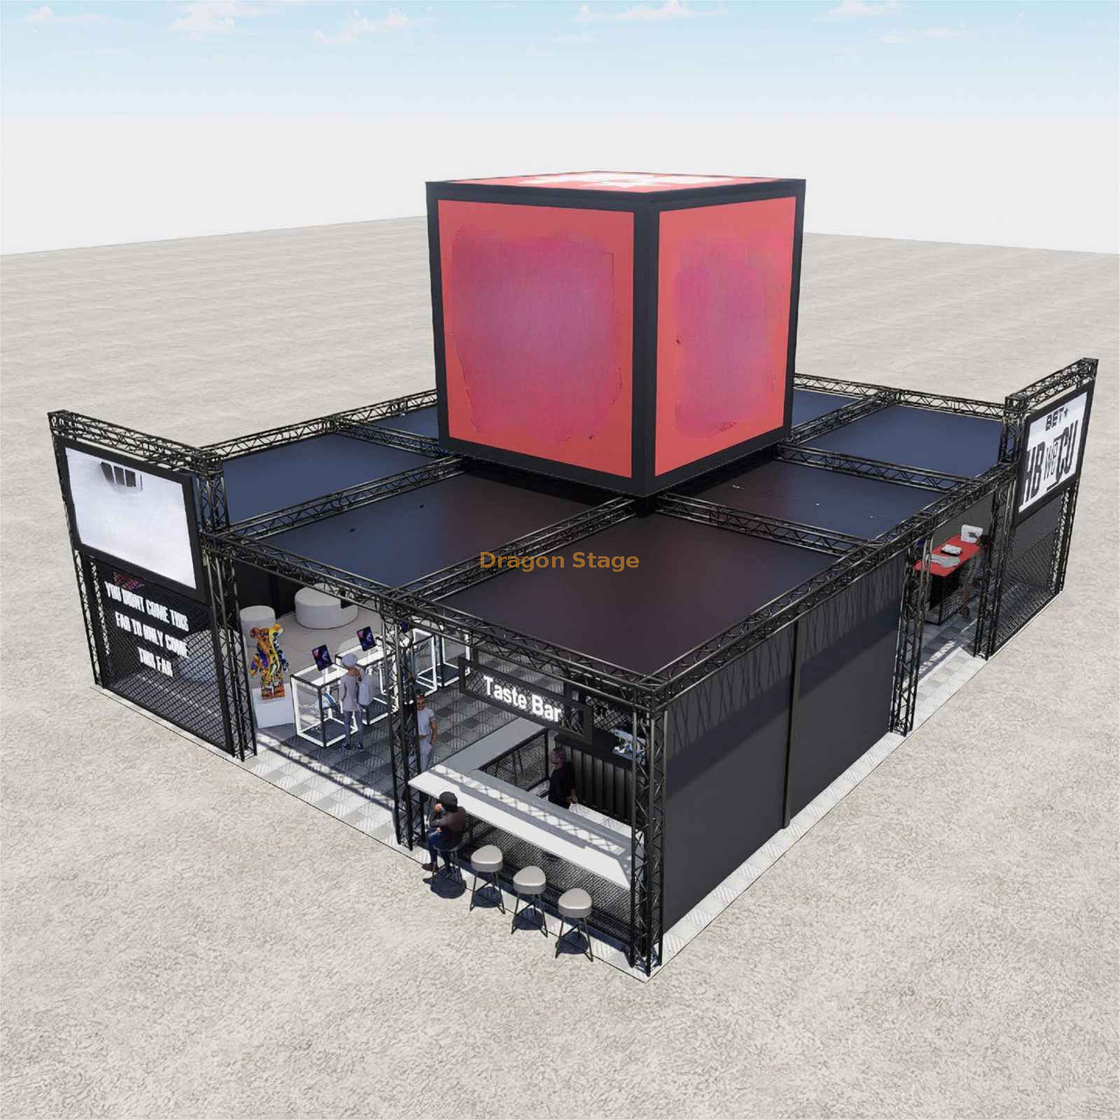
The 290mm aluminum truss is a crucial component in the construction of Portable Easy Assembly Aluminum Modular 50x40ft Exhibition Trade Show Stand Booths. Its versatility and strength make it an ideal choice for creating a wide range of booth designs, catering to diverse needs and preferences.